Setting up a 16-bit DOS dev environment on macOS
I still like DOS. For many months now, I’ve been trying to set up a lean development environment that lets me develop games stuff in VS Code on my Mac and easily deploy it to DOSBox. My requirements are pretty simple: Just C, please.
When you ask around, almost everyone recommends DJGPP. It’s a GCC toolchain for compiling C/C++ 32-bit DOS applications in protected mode. The downside is that installation on macOS is difficult, and you’re probably better off working in a Linux VM. For my purposes, I simply don’t need this powerhouse. My C skills are limited, and I don’t need protected mode. I don’t need any mode, really!
DJGPP’s complexity made me look at other paths. Over the past few months, I’ve tried various Turbo Pascal setups, including compiling directly in DOSBox. But the more time I spent with .pas files, the more frustrated I got. It was the second programming language I learned as a teenager, but looking at it today, the syntax and pretty much everything else about it are just terrible. Somewhere along the way, I read Voxel’s blog post about setting up Open Watcom v2 for 16-bit DOS development, and immediately (well, 8 months later) wanted to try it out and port the instructions over to macOS.
Open Watcom v2 is a community fork that started after the original team seemingly stopped working on the codebase. It includes bug fixes and supports 64-bit and ARM hosts. While the project provides CI/CD-generated binaries for many systems, the maintainers do not offer precompiled releases for macOS/Darwin. So, let’s just do it ourselves!
You need a compiler to compile a compiler
If you’re a developer, you can skip this section. It’s highly unlikely that your system lacks the basic development setup, but if you’re new to all this, read on.
To compile open-watcom-v2, you need Clang [klæŋ], which is bundled with Xcode. Apple offers the “Command Line Tools for Xcode” package as an alternative to a full Xcode installation. This package contains the same macOS SDK and toolchain binaries that ship with Xcode.
xcode-select --installOnce you have installed it, you will have access to Git and Clang.
Alternatively, you can install Homebrew, which will also install Apple’s Xcode Command Line Tools and provide you with more options later on.
Compilation
git clone https://github.com/open-watcom/open-watcom-v2
cd open-watcom-v2

# optional: If the compilation fails, try using the repository's state
#           on 10 October 2026, when this post was written.
# git checkout 08a5064dd9831edf10234844630e605e83606989

. ./setvars.sh
OWTOOLS=CLANG OWGUINOBUILD=1 ./build.sh rel
This is the build I recommend. OWTOOLS=CLANG is required on macOS. OWGUINOBUILD=1 skips the GUI versions of the tools: the IDE, the graphical debugger, the resource editors and so on. These are Win 3.x, Win NT and OS/2 programs we don’t need for DOS development.
The project recommends putting these variables into a copy of setvars.sh (e.g. myvars.sh), but that’s not necessary. Setting them in front of the build command works just as well. Still, take a look at setvars.sh in case you want to tweak other stuff.
With documentation
Open Watcom’s documentation is built with WGML, Watcom’s own document processor. Its source code isn’t available, and it only exists as a DOS and OS/2 program. So on a Mac the build has to run it in DOSBox. In his post, Voxel writes that the build script could not find DOSBox, even though it was installed. I encountered the same problem (Error(E33) “Missing DOSBOX configuration or unsupported building platform”), but upon examining the build script, I realised that we only need to set OWDOSBOX to point to the DOSBox binary. Since the path to DOSBox Staging contains a space, it needs an extra pair of quotes. The documentation build is switched off by default, so we also need OWDOCBUILD=1:
OWDOSBOX='"/Applications/DOSBox Staging.app/Contents/MacOS/dosbox"' \
OWDOCBUILD=1 OWTOOLS=CLANG OWGUINOBUILD=1 ./build.sh rel
This should add the help files for the DOS tools (binw/*.ihp). But if you just want to read the manuals, the C Library Reference and the C/C++ User’s Guide are available online.
If you want everything, including the GUI tools and their help files, drop OWGUINOBUILD=1. The Windows 3.x versions of the GUI tools end up in binw/ and should run in Windows 3.1 inside DOSBox.
Installation
Compiling the recommended option took 18 minutes on my MacBook Pro with an M1 Max processor. The result ends up in the rel/ folder, which you can now copy to a permanent location. I recommend /opt/watcom/:
sudo mkdir -p /opt  # may not exist on a Mac without Homebrew
sudo cp -r rel /opt/watcom
You can then delete the entire open-watcom-v2/ folder, as it is no longer needed.
Now we’re ready to start compiling!
Hello World
#include <stdio.h>
#include <conio.h>

int main() {
  printf("HELLO WORLD\n");
  printf("Press any key to exit...");
  getch();
  return 0;
}
To compile programs, three things must be set in your shell’s environment:
/opt/watcom/armo64must be in your$PATH$WATCOMmust be set to/opt/watcom$INCLUDEmust be set to/opt/watcom/h
I don’t like setting these globally, so I put them in a build script:
#!/bin/sh
export WATCOM="/opt/watcom"
export INCLUDE="$WATCOM/h"
export PATH="$WATCOM/armo64:$PATH"

wcl hellwrld.c
Once hellwrld.exe has been created, there are two ways to run it:
Execute and quit
The following command runs hellwrld.exe inside DOSBox, and the window closes as soon as the program exits. If your program just prints “Hello World” and quits, blink and you’ll miss it. That’s why the example waits for a key press.
"/Applications/DOSBox Staging.app/Contents/MacOS/dosbox" hellwrld.exe
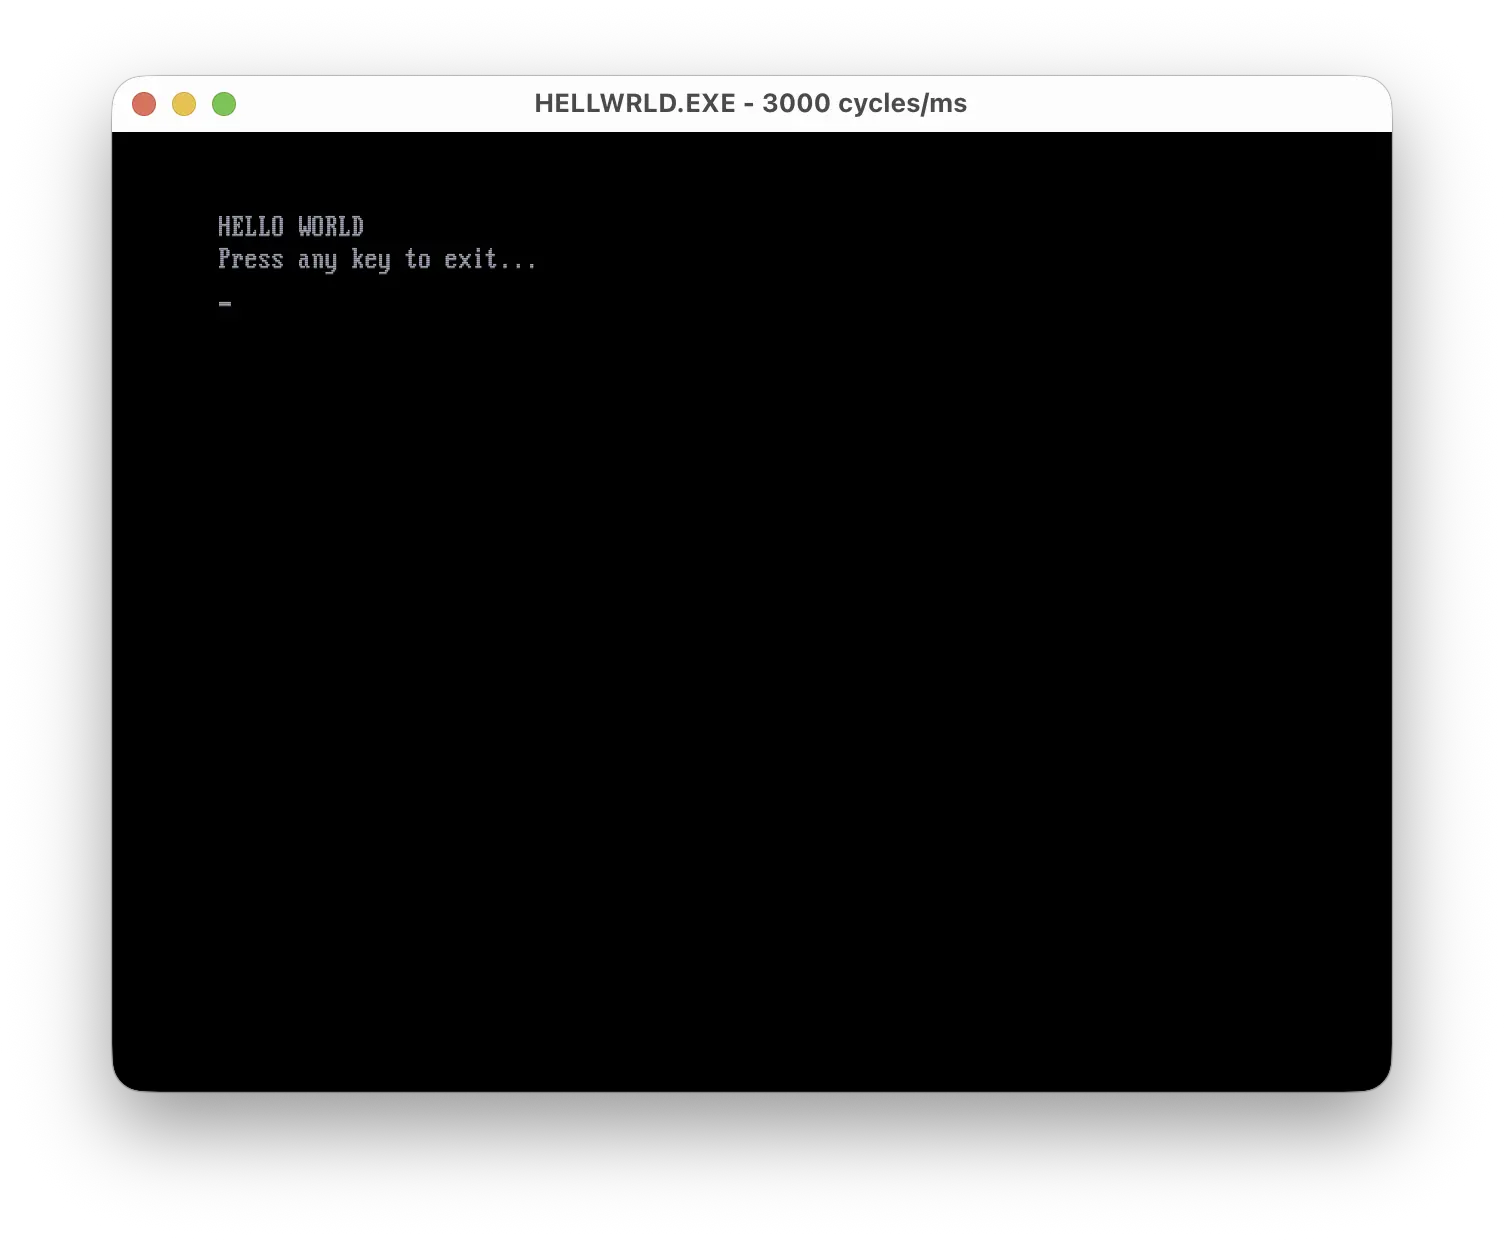
Launch DOSBox with a custom config
If you need to pass options or want to remain in DOS to view error messages, I suggest a different approach: a custom config file in the project directory. This also enables you to mount the entire build directory in case your program needs to load assets.
[dosbox]
machine=ega

[autoexec]
mount G .
G:
HELLWRLD.EXE#!/bin/sh
"/Applications/DOSBox Staging.app/Contents/MacOS/dosbox"
# If no filename/argument is specified and a dosbox.conf file is found in the
# current working directory, it will be read. `-conf dosbox_alt.conf` works too.
#
# You can also put this into your ~/.zshrc
# alias dosbox='"/Applications/DOSBox Staging.app/Contents/MacOS/dosbox"'
# But spelling out the full path makes it easier to switch between DOSBox flavours.Back to VS Code
VS Code can run scripts as tasks. Here’s an example .vscode/tasks.json. The problem matcher will populate the Problems panel with Watcom’s errors. The default build task executes build.sh, which contains the compiler flags. The second task, “Run in DOSBox”, builds first and then starts run.sh. You’ll find it in the command palette under “Tasks: Run Task”. All referenced scripts need to be executeable (chmod +x run.sh build.sh).
{
  "version": "2.0.0",
  "tasks": [
    {
      "label": "Build",
      "type": "shell",
      "command": "./build.sh",
      "group": { "kind": "build", "isDefault": true },
      "problemMatcher": {
        "owner": "watcom",
        "fileLocation": ["relative", "${workspaceFolder}"],
        "pattern": {
          "regexp": "^(.*)\\((\\d+)\\): (Error|Warning)! (\\w+): (.*)$",
          "file": 1,
          "line": 2,
          "severity": 3,
          "code": 4,
          "message": 5
        }
      }
    },
    {
      "label": "Run in DOSBox",
      "type": "shell",
      "command": "./run.sh",
      "dependsOn": "Build",
      "problemMatcher": []
    }
  ]
}
For autocompletion and error checking, I recommend clangd instead of Microsoft’s C/C++ extension. It’s lean and fast, and the language server is already installed, because it ships with the Command Line Tools. It’s configured with a plain compile_flags.txt in the project root, one flag per line. The trick is to hide the Mac’s own headers, use Watcom’s instead, and define the same macros as the Watcom compiler for 16-bit DOS.
The DOS project I’m currently working on has the following Watcom compiler flags:
#!/bin/sh
export WATCOM="/opt/watcom"
export INCLUDE="$WATCOM/h"
export PATH="$WATCOM/armo64:$PATH"

CFLAGS="-zq -bt=dos -ml -0 -ox -w4"
# -zq      quiet mode
# -bt=dos  16-bit DOS executable
# -ml      large memory model
# -0       8086 instructions
# -ox      (Watcom's help describes it as a "bundle of optimisations")
# -w4      all warnings

wcl $CFLAGS *.c

# A proper project structure could look like this:
# `wcl $CFLAGS -fo=build/obj/ -fr=build/obj/ -fe=build/dist/TEST.EXE src/*.c`
# dosbox.conf: `mount G build/dist`
For this case, the following clangd compile flags work best for me. With this, autocompletion, go-to-definition and hover info work with Watcom’s conio.h, dos.h, i86.h, etc.
--target=i386-unknown-none
-nostdinc
-isystem/opt/watcom/h
-D__DOS__
-D_M_I86
-D_M_IX86=0
-D__declspec(x)=
-D__based(x)=
-D__near=
-D__far=
-D__huge=
-D__interrupt=
-D__watcall=
-D__segment=unsigned short
-D__int64=long long
But clangd isn’t Watcom. It can’t read MK_FP (make far pointer), so use the long form instead, e.g. (type __far *)0xA0000000UL. Also, clangd thinks an int is 4 bytes, but in the DOS build it’s 2.
Now, when’s the next DOS Jam?